

Do you know?
That the summer is the only and last moment to fix all odds that occurred during the last monsoon such as Leakage from the terrace, choking of the rainwater pipe and malfunctioning of the rainwater harvesting system etc.
Here in this article, we will discuss all the Leakage from the terrace, Waterproofing of Terrace or waterproofing of roof in India.
With the study of the data of above 13,20,000 site inspections (sites of home, commercial premises, society buildings, warehouses, etc) and 1,29,000 clients project the following fundamental of the waterproofing are well understood and can be presented as:
Poor workmanship & non-compliance of the application procedures are the most common reason for Waterproofing failure.
Whereas the other 36% happens because of the selection of the products which are likely incorrect and poor identification of the leakage source.
To overcome the most common errors of the Waterproofing at Terraces, Raja & Raja® (Experts in Waterproofing solutions) bring you the step by step guide to do the waterproofing at existing Terrace using chemical treatment.
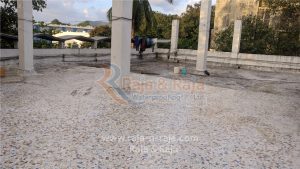
Surface preparation:
The surface preparation is the key to any of the treatment process, as it shall create a strong foundation for any waterproofing systems to last longer than life expectancy.
The surface preparation needs to be in the following ways:
- Cleaning / Washing:
Clearing with a brush or washing with pressure washer shall remove all the impurities like oil or grease, loosely adhered particles and weaken or decomposed algae/fungus which might have accumulated on the surface because of weathering.
Caution: Upon cleaning with flowing water or pressure wash, adequate drying of the substrate is mandatory. If the surface remains wet, the adhesion of primer may not remain the same.
Cleaning of the existing surface - Repair or Strengthening of Weaken substrate:
The loosen concrete or plaster to be removed and re-plastered or re-concreting is required.
Once done, the same needs curing for a sufficient period.
Remember: General curing period what we recommend is of at least 3 days.
If the surface is tiled or is with china mosaic chip then the hollow tiling part has to be treated first.
Moving forward this surfaces to be cleaned to remove any dirt or foreign particle left. The surface needs a strong investigation for any presence of the crack.
Repair of Floor
Read more about Cracks & Types of cracks
- Sealing the Outlets & projections:
Every flat roof shall have an outlet for the rainwater or overflow water to drain down off the roof.
Likewise, there’s plumbing projection with air-release & sewage projection with gas-release for any roof.
A few of the roofs also have the columns/pillar for the overhead water tank or a platform for the lift room access. The joints between the surface & floor require to be sealed. Ensure that there’s no void or opening for water to enter through it. - Apply Primer:
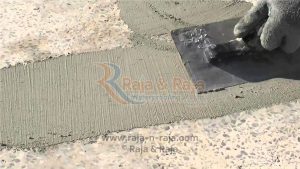
The primer act as the bonding agent between the coating and the surface which ensures the better adhesion along with an increase in the coating’s durability and also helps with additional protection to the surface. - Apply Base Coat:
Application of Base Coat is the primary, important & critical part of any coating. Base Coat straightly affects the performance & functionality of the coating system.
Waterproofing Base Coat creates a foundation for the coating to absorb the movement shocks which may be caused either by the surface or because of any external movement.
This kind of step also includes creating a coving (गोलाई in Hindi) at the junction of walls & floor. - Apply Reinforcement:
Adding a reinforcement in the system not only adds the life to the coating system but also extends the performance level of the coating. It also helps to overcome crack bridging without coating failure. - Apply Intermediate Coat:
Intermediate coats have different purposes like insulation, isolation of the system or even adding the additional protection level to the coating system. - Apply Topcoat:
As the name suggests, it’s a top-level of the system. It comes with the many properties like Anti Abrasive, UV stable, Anti Static, Solar Reflective & Emitive and aesthetically pleasant.
All of the above-mentioned properties are not the part of the standard topcoat available at the Waterproofing market in India but it’s not difficult to find one!
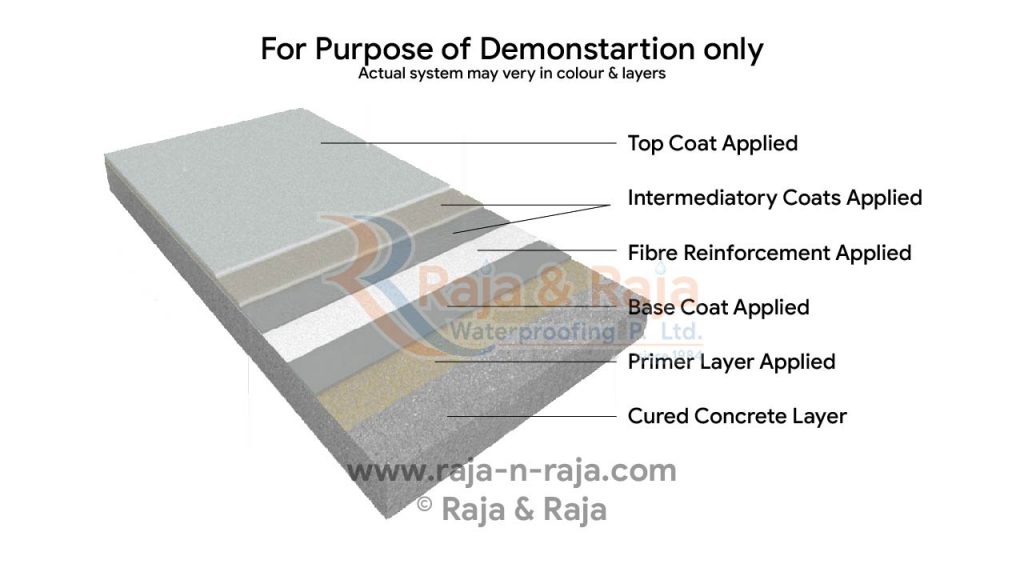
Demonstration Of System


